C.R. Cooking Chronicles: Tilapia with Cream Sauce

Hello all! Are your sleigh bells ringing??? It's so close to Christmas and the excitement is overwhelming! So, to ease my nerves over the past couple days, I've been investing my spare time into the new place and food. We'll get to how the new place is looking later, but I wanted to share this amazing recipe that I concocted with you guys!

If you follow me on Instagram (@cohesiverandomness), then you may have seen these photos on yesterday


 I promised you guys a recipe and as a woman of my word (most of the time), here you go! Oh, and sorry about the wack iPhone pics. This went by so fast that I didn't have time to grab the camera.

Tilapia with Mushroom, Spinach and Prosciutto Cream Sauce

You'll need:
5 tbsp of butter
1 bag of Tilapia fillets (or any white fish you prefer)
1 pint of white mushrooms
1 package of diced prosciutto
2 cups of baby spinach
1 large shallot
1-1/2 cups of heavy cream
1 tbsp of cooking sherry
1/2 tsp of seasoning salt
1/2 tsp of Cajun seasoning
1/2 tsp of garlic powder
salt
pepper

Preparation:
Preheat your oven to 350 degrees. Throw about 3 tbsp of butter in a glass baking dish and put in the oven until melted. Pull out of the oven and let cool to room temperature.


While your butter's melting, clean, stem and slice your mushrooms (next time, I'm gonna save a couple steps by buying the ones that are pre-sliced) and dice your shallot.


Place all of your fish fillets in the dish, season with salt and pepper (but not too much...remember, all of the flavor and seasoning will come from the sauce) and baste with the butter. Oh, and a little side not:, when prepping your fish, be sure it's completely thawed and pat them dry with a paper towel. Throw your fish in the over and bake for about 10-12 minutes or until fork-flaky.

In a skillet, melt 2 tbsp of butter and brown your diced prosciutto.


Next, add the shallot and mushrooms and stir until the mushrooms brown.


Pour in your cream and bring to a simmer. Add the sherry and all the seasonings and simmer until the sauce thickens. Finally, toss in the spinach and stir until it wilts.


By this time, your fish should be done and all you have to do is serve. Plate your fish, pour on a scoop of sauce and pat yourself on the back, because that's it! You'll be so excited and proud of yourself that it'll take your mind off of your anxiety-inducing countdown to Christmas!

I served my with a few broccoli stems and garlic bread sticks, but I think some roasted asparagus or whole green beans would be a delicious match as well.


There you are folks, so head on out to your grocery store and try this tonight. I promise, you'll be thanking me tomorrow!

Xoxo,
Coco

P.S. - I've got some special stuff coming up soon. One of you guys are going to be able to win something that I created! More info coming soon!!!

Christmas at the Ham's!

Hey guys! Man it feels good to be back. We're all settled in our new place, but JUST got Internet access a few days ago! We had give AT&T Uverse a piece of our mind for giving us the run around on our install date for over week, just to come back and tell us they can't schedule it until FEBRUARY!!! So, anywho... all is well now with Comcast. So far.

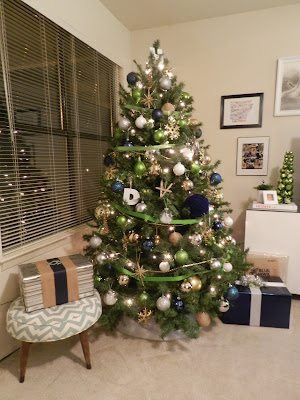
But, back to the point of this post: TIS THE SEASON everyone! I love this time of year. Christmas is around the corner, so it was time to not only unpack our lives, but also bust out all of the decor. You guys get the first look at our spot, along with all of holiday home stuff! So, without further adieu...


Well, that's it. Lots of DIYs and thrift store finds, like the ribbon stretched canvas and the brass box on the coffee table. All the decorations are up, but the space is nowhere near done. Trust me, we've got a ways to go!

So are your decorations up? Did you have your tree up before Thanksgiving? Are you of the wait-til-the-last-minute variety? Or are your decorations still up from last year? Yeah, I know some people that do that... I'll lend no other comment. Ha!

Xoxo,
Coco

Reader Weigh In: Real vs. Replica

I know I'm not the only one that has champagne taste on a TAP WATER budget. But, am I the only one that doesn't mind a nice replica when the opportunity arises? I'm not talking about your average bootleg from the backroom of shady boutique. I'm talking quality replicas, made with quality materials and stood behind by decent sales people.

Everyone isn't able to call of their favorite Chanel or Birkin sales rep and have them hold the latest handbag to hit the market. These bags retail from $5,000 to $20,000! As my bestie would say, "GET YO LIIIIFE!!!"


But if you stumbled upon a credible seller, with quality products...and new you weren't doing anything illegal...would you spring for these coveted handbags if they were available at a price like $200-$300???

via @nikimoush Instagram

What about those infamous Christian Louboutins??? Would you spring for them if they were made to fit into your price range???

via @nikimoush Instagram

Personally, I live for a deal, so if I can get quality materials in high-fashion styles, I'm all over it!, But I want to know how you feel about it, so I need you guys to weigh in on this. How do you feel about real vs. replica. Would you fake it til you make it? Do tell!

Xoxo,
Coco

DIY: Campaign-Inspired Parsons-Style Bookshelf

So during my little blog-less hiatus, I was happy to still be able to tackle a few DIY projects. And although this is my favorite project to date, it just so happened to be the most involved DIY project that I've ever done. And when I say involved, I really mean time-sucking and PAIN-inducing! Working on this bookshelf really opened my eyes to the fact that I'm no pro at furniture building and that I'm lacking incredibly in appropriate tools and workshop space! Let's just say that I have quite the dreamer's Christmas list!

Anyhoo, on to my proudest moment as a DIY-er. It all began with a wall-without-a-purpose. So much without a purpose, that I don't even have a picture of it! Here's a super old pic from right after our move in. The wall that I'm referring to is actually on the other side of the floating shelves.


I was bored with just rotating out pieces of art, so my wheels started turning out the possibilities. The wall was part of a major walkway, so it wasn't a good place to put anything that would stick out too far. I knew I wanted something decorative, like the art, but also something that would provide a little function. Something So, I thought that a nice, tall bookshelf would be the perfect filler.

Style wise, I knew I wanted something timeless and classic, but not traditional. Something simple and understated, but not boring. This, of course, is the description of all things Parsons.

Parsons Console Table - Style At Home

Parsons Dining Table - Apartment Therapy

Parsons Cube Side Tables - West Elm

Parsons Tower - Design Sponge

Not only did I love the style, the design seemed simple enough for me to produce on my own! WIN WIN! Of course, I instantly began scouring the Internet for some easy-to-follow building plans and actually came across two. This one from Ana White and this one from The Design Confidential. The combination of the two were extremely helpful. A fully-functioning and equip workshop would've been even more helpful, but that's another story. And instead of telling it to you, I'll give you the rundown by photo...iPhone photo, that is.

Found a plan

Sketched out my own dimensions

Made a trip to my second home

Spend almost two hours in the lumber section

Found this nice guy to cut all 29 necessary pieces

Started a rough layout

Pre-drilled all my holes (over 90 of them)

Sanded and primed every side of every piece

Assemble shelves

More pre-drilling

More pre-drilling

Final Assembly!

Got it in place...forgetting that the floor was not level

This is where I patted myself on the back for a job well done!!! I swear, the pride was almost overwhelming. I was in love! I went with the white to maintain the simplicity and class, and so that it would blend nicely with the rest of our furniture. Painting it a different color would've just made it a distraction. And although I was completely in love, it still looked as if something was missing...it just wasn't "special"yet.

Well, insert a little inspiration from campaign style furniture:

Green Campaign Dresser-Lonny Magazine

Magenta Campaign Dresser - Lulie Wallace

Cream Campaign Dresser/Hutch - That's Smart Deco

I love the simple lines of the this style of furniture, but I also love how the brass accents add so much to the final look of each piece. So what did I do? I went out and got some brass brackets!


And along with some books and accessories, they were just what it needed.


Almost every book and accessory came from a thrift/consignment shop: the two brass bowls ($2.50 and $5.00), the wooden shoe molds ($2.50 ea.), the brass cranes ($4 for the set) and the antique metal compass ($7.00). The white coral was a gift from my amazing friend/ex-coworker, Rachel (hey girl!). And I found the gold rhino and the A and Z bookends at TJMaxx for less than $5.00 each. 

And there you have it...my DIY campaign-inspired Parsons-style bookshelf journey in photos! And guess what? I'm ready to do it all over again! Would you like one?

Xoxo,
Coco