Hey guys! I’m back to give a miniature room breakdown of my apartment show you my dining room. Who am I kidding…it’s the only room in my apartment that I could consider being close to almost being done. Let’s take a gander at her, shall we?


I consider it “almost close to being done” only because it can’t be decorated any more…as in, I can’t stuff anything else in there…except maybe a rug, but ehhh (shoulders shrugging). I change things up and switch things out or remove things completely, but there’s no need to add anything else…except maybe two more chairs, but oh well (eyes rolling). Ok, seriously, I’ve got a rug and two more chairs on my list of things to get for my dining room. The chairs are a simple fix (when I’m ready to shell out $75 for the pair… from Target, by the way). I’m thinking about DIY-ing a rug. A round one maybe? Maybe not.

The table I found at a thrift store. The top that came with it was beyond repair, so it was trashed. I shopped around and found a replacement top for less than twenty bucks in the lumber section at Lowe’s. Once I got it home, I sanded, primed, painted, and polyed both the top and base by following some tutorials like this one floating around on the net.


Up until about five days ago, the window treatment in my dining room consisted of only the vinyl mini-binds that came with the apartment. It wasn’t completely horrible, but lacked any ounce of style or personality. Whatever treatment I decided to use, I knew I wanted to make it myself. I’m always surfing the net in search of what other bloggers are up to and had an “AH HA” moment when I came across this tutorial for a roller shade. It looked fairly simple to do, and what made it even better was that it was CHEAP! Count me in! When it came to selecting a fabric, I knew I wanted something that would draw your attention away from the fact that you were standing in a white box. I found this lovely number on a random visit to Hancock Fabrics. It was on sale for 50% off, so I snatched up two yards. The actual roller and hardware was about $6 at Wal-Mart. I was beyond excited when I finally got it hung and took a step back to marvel in its glory and my thriftiness.
It was all good and great, but it was missing something. My beauty needed a frame…insert drapes. Now, floor to ceiling drapes can cost a pretty penny. If you find one panel for $20, you’ve got a great deal on you hands. Well, I couldn’t shell out $40 for drapes, so I called on my best friend…Google! I searched for inexpensive DIY drapes, and got back several hits for something called “drop cloth drapes”. If you’re unfamiliar with the term, drop cloths are used to cover/protect floors and furniture during paint jobs. Sooooo, I headed down to my neighborhood Home Depot and picked up two 6’ x 9’ drop cloths at $10 each. Twenty beans for drapes that I don’t have to sew?!?! Thank you Sweet Baby Jesus!!! And with a little measuring, a lot of ironing, and a couple screws and clips later, my pretty little roller shade was perfectly framed by two floor-length canvas drapes.


Now, if you’re friends with me on Facebook, you may have seen my post about this beauty.

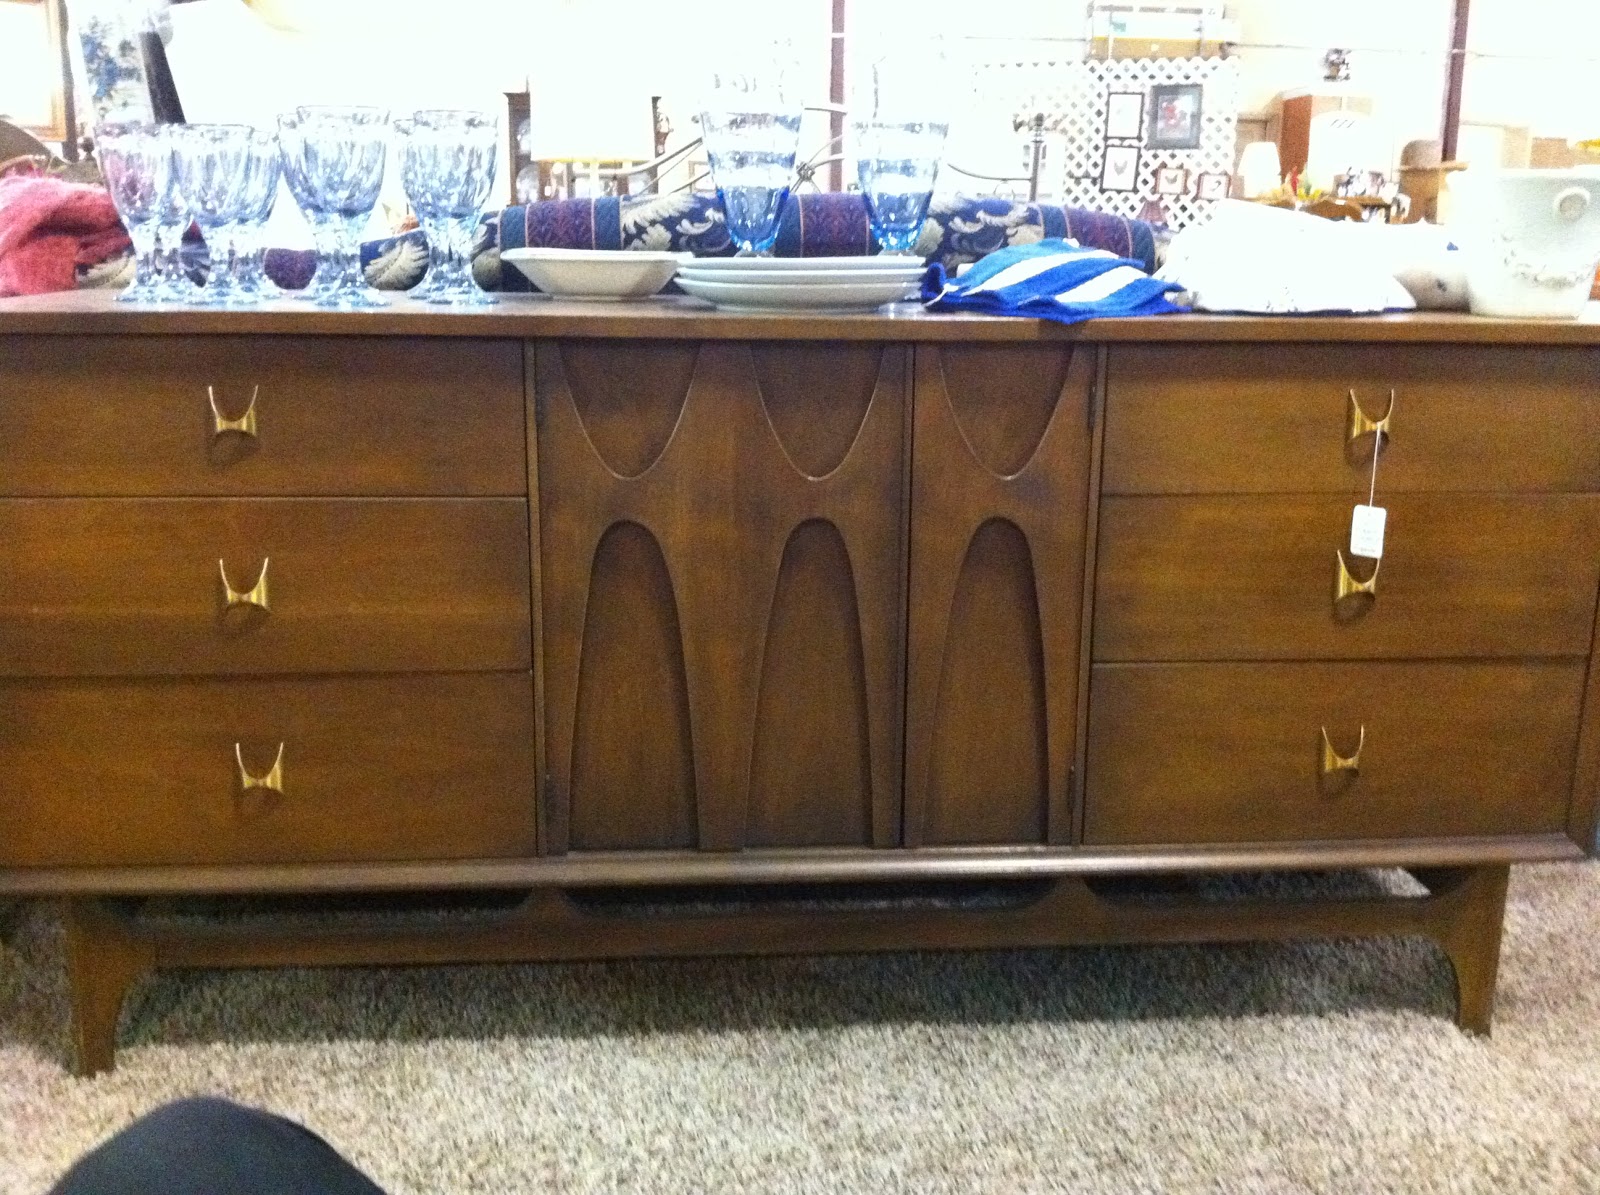
I spotted it over a week ago at a local consignment shop that I had on my list of places to visit. I think I let out a little squeal once I turned the corner and saw standing amongst the other hundreds of treasures. You see, I’ve been looking wishing for a mid-century credenza for over a year now. I never though I’d be lucky enough to find one, not just in the in the state of Arkansas, but only 1.2 miles down the road from my house. Even better, it was only $200! Yaaayyyy for those people who have $200 bucks laying around…uh, that wouldn’t include me. Wah waahn : (


It hurt my heart. It was right there in front of me and I couldn’t have it. Well, I made up in my mind that if I couldn’t have it, nobody could. I went back to that consignment shop every day for the next four days, just to make sure of it. I was already hurt that I couldn’t have it, but I would’ve been devastated to know that someone bought it right from under me. It was perfect. Its solid walnut body in perfect condition with its nine drawers (dovetail construction-the highest quality) and just the right amount of detail to put it light years beyond the ordinary without being something you’d be tired of looking at in a year. I couldn’t just walk away. I wanted it. I wanted it baaad.


I gave the piece a thorough inspection and found the name Broyhill Premier in the top left drawer. Being curious of how old the piece was, I dialed up my friend, Google, again and was stunned by what I found out. Turns out, I had just found a Broyhill Brasilia Triple Dresser. Dating back to the early 1960’s, it could easily be worth $800 - $1100!!! This is the point where I broke out my credit card and asked them if they delivered.
I like to call it my first real investment. ; )


I don’t think is going to live in the dining room for long. It may be better suited as a tv stand in the living room. I’m not too concerned with it’s purpose right now; I know that its going to be put to great use in my future house (whenever that is).
I’m happy with the space right now. Hoooowever, that’s not to say some things won’t be tweaked every now and then. It’s what I do!


Here’s a quick source list for those of you who care to know where this stuff came from.
Table – thrift store
Chairs – Target
Credenza – ABC Consignment shop
Drapes (drop cloths) – Home Depot
Shade – DIY-ed using this fabric
Drapery Hardware - Target
Floating shelves – IKEA
Stemware, white dinnerware & green ramekins – TJ Maxx
Green salad plates – Target
Placemats (on table & shelf) & table runner – IKEA
Art & gray string balls – DIY-ed by me
So what's going on in your place? Thinking of redecorating? Is any of it even a big deal? Spill the beans!!!
So what's going on in your place? Thinking of redecorating? Is any of it even a big deal? Spill the beans!!!
No comments :
Post a Comment