
I'm back with a new Saturday Styling post, and I'm finally talking about my newly added bookshelves!

Not the most aesthetically pleasing looking solution, but I guess it worked for them. Unfortunately, it wasn't doing it for me, so those shelves had to go.

Fast forward over a year and half later, and the space still looked like this. It wasn't until a late Saturday night about a month ago, when I got the idea to install shelves that spanned the entire space. Not only would it finally give the space some purpose, but I could finally work on my shelf styling game in my own home!
So at around 8pm, I drove hub's truck to Lowes and grabbed 3 2" x 12" x 10' boards (in the end, I only used 2), a bunch of 8" heavy duty L brackets and a box of wall anchors.
The space is just a bit wider than 10' so there was no cutting necessary. I grabbed my stud finder, found ALL the studs in the wall and even found the plumbing pipes that run the the sink (definitely wanted to make sure I avoiding putting holes in that!). A bracket at every stud would've been overkill (1 every 16 inches), so I decided to use every other stud. And since I installed directly into the studs, I didn't have to use the wall anchors.
Hind sight: I would've alternated the brackets from one shelf to another so that they weren't all in line. Until I paint them the wall color, it makes it a bit harder to style the shelves in a more organic fashion.
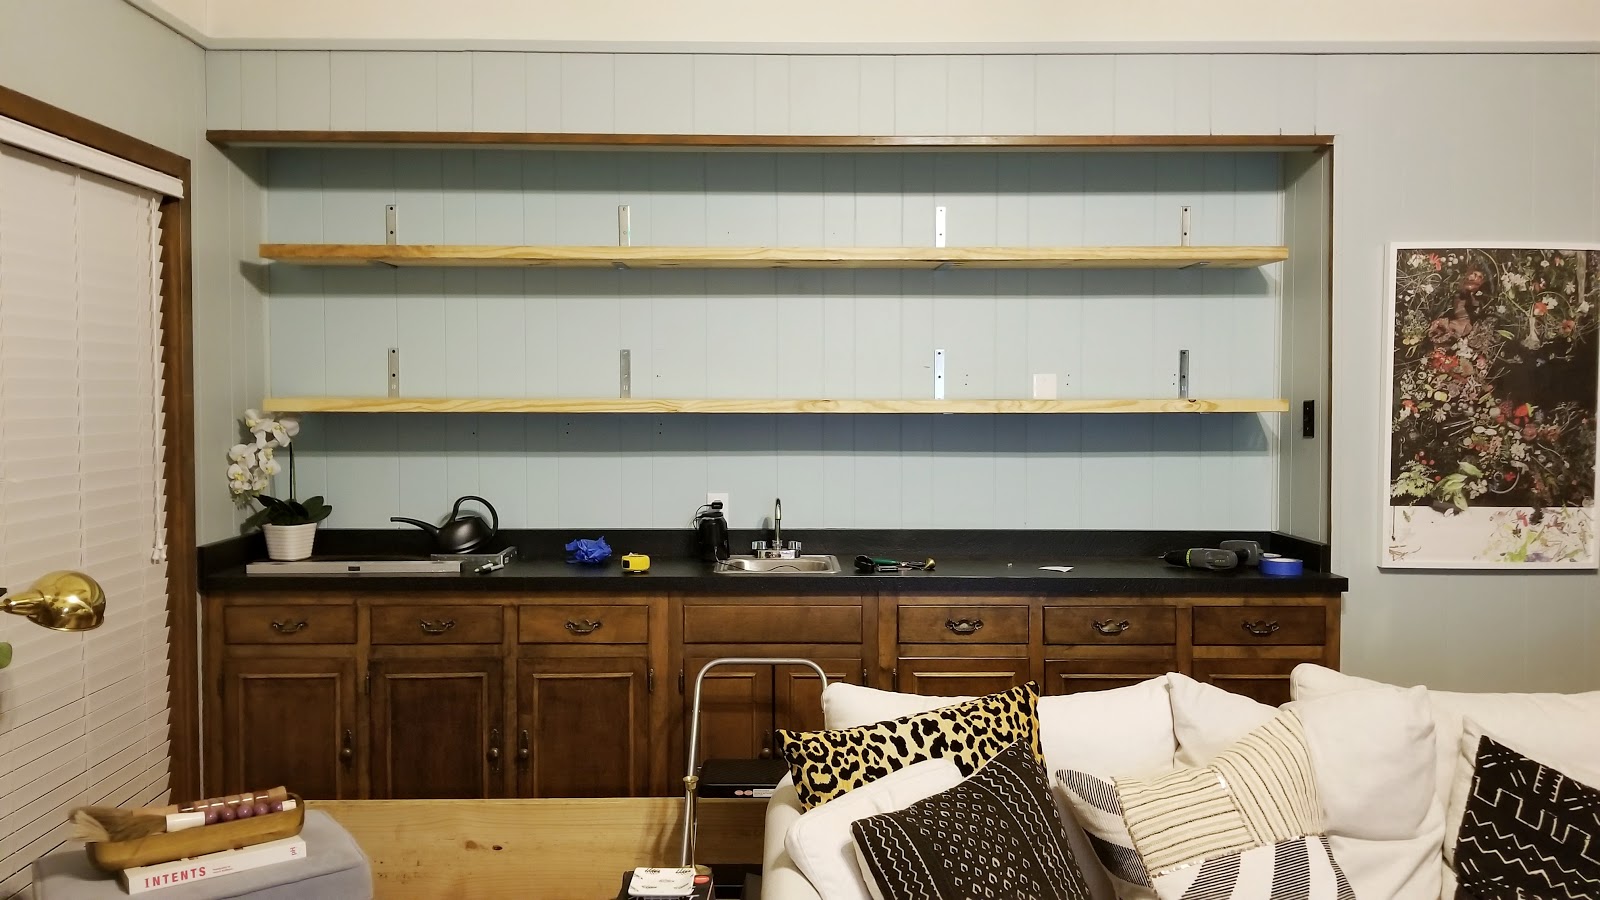
I hung the shelves to sit on top of the brackets to give a "floating" effect without all the hard work and extra steps of floating shelves. I knew I could easily hide the brackets with the decor that was going on them!
Once the shelves were up (which took me about 2 hours to measure, mark studs, pre-drill holes in the paneling, install the brackets and then secure the shelves), I broke out the same paint that I've used on all the trim and doors throughout the house. Two coats later, I was done!
I let them dry overnight and woke up the next morning and started my styling frenzy (I had a photo shoot just hours later)!


Yes, none of my frames have photos or art in them! LOL! I'd like to say that I'm taking my time to find the perfect pieces, but I'd be lying! Tonight turns into tomorrow, which turns into this weekend and now here we are a month later! I'll get to them soon! Promise!
Here's a source list of materials used for the shelves:
2" x 12" x 10' - Lowes
8" L Bracket - Lowes
Shelf Paint Color - Benjamin Moore Black Onyx 2133-10
And for what's on the shelves:
Design Books:
Allegra Hicks: An Eye for Design
The Finer Things
Living with Pattern
Design Sponge
Domino
Decorate
Living In Style: Morocco
Decor:
Grapewood Branch
Set of 3 Wooden Bottles
CB2 Burl Wood Small Box (on sale!)
CB2 Burl Wood Large Box - (on sale!)
Assorted IKEA Frames
Souk Bohemian Moroccan Clay Bowls (similar)
Target Terracotta Vases (similar, similar, similar)
Nate Berkus Brass Vases (similar)
Vintage Ram Bookends (similar)

I'm so excited with how it all turned out! This space is going to be ever evolving, so this just the beginning!
Kudos to you for working this solution out at the last minute! It looks fabulous. I know I say it all the time, but I love how fearless you are! Thanks so much for sharing.
ReplyDeleteAww! Thank you so much! There's no better motivation than tight deadlines!
DeleteThey are wonderful looking shelves. So simple to make and very effective in terms of space creation. Great Job! I have floating shelves pretty much anywhere i can put them in my house. My next project is to build floating shelves around the tv on my living room wall. Going to be a tough project i think. I got the idea from Top9Home.com Wish me luck!!
ReplyDelete